Flashing Arduino Bootloader on Atmega328p Microcontroller
- Emmanuel Odunlade
- https://twitter.com/emmaodunlade
- emmaodunlade@gmail.com
- 37.350 Views
- moderate
- Tested
Introduction
Cost and size, just to mention a few, makes using an Arduino board in certain projects an overkill, often times its always too big, or too expensive for the scope of the project especially when it’s a project that we need to make several units. One good way to retain the simplicity that comes with the use of the Arduino platform while avoiding all other deficiencies is to use the Atmega328p microcontroller alone and program it using the Arduino IDE and its simplified version of the C programming language. However, the atmega328p microcontroller cannot be used with the Arduino IDE until it is flashed with the Arduino bootloader.
Our goal for this tutorial will be to understand how the Arduino bootloader works and how an Atmeg328p microcontroller can be flashed with it.
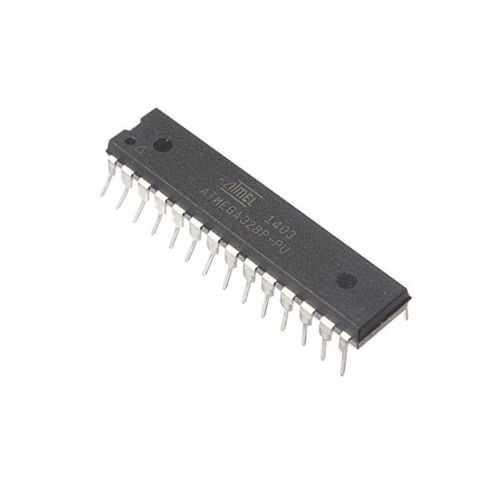
The Arduino Bootloader
Programming microcontrollers can be a bit tricky, as they require special programmers and .hex files, not to mention the huge knowledge of the C programming language required to write the code. It’s not beginner friendly, thus to eradicate these issues, Arduino created a .hex file which can be installed on AVR chips that allow you to program the board over a serial port, ensuring all that is needed to program a microcontroller (after installing the hex file) is a serial connection between the microcontroller and the Computer which can be achieved using a USB to UART adapter. This hex file is called the Arduino Bootloader.
The bootloader is very similar to the BIOS Running on a PC and performs two tasks:
- It monitors the serial communication line to see if the computer is trying to program it. If this is the case, it accepts the code from the computer and stores it in a specific location in the memory of the microcontroller in such a way that the bootloader itself is not overwritten.
- When the computer isn’t trying to upload code to the microcontroller, the bootloader instructs the chip to run the code that’s already stored in memory. Once it locates and runs your program, the Arduino continuously loops through the program and does so as long as the board has power.
Asides from the need to use the Atmega328p in standalone mode, flashing the microcontroller with the bootloader may be necessary when you need to replace the microcontroller on your Uno board for instance or when you need to restore a bricked board which no longer allows code uploads.
Burning the Bootloader to a Microcontroller
There are quite a number of techniques for burning the Arduino bootloader to the microcontroller but we will focus on using the easiest method which involves the use of the Arduino board as an In-System Programmer (ISP).
During the manufacturing process for electronic devices, microcontrollers are usually programmed after they have been mounted on the PCB. This Programming process is referred to as In-System Programming (ISP) and it requires the PCB to have certain header pins through which the microcontroller can be accessed for programming. Most Arduino and Arduino boards also come with this feature as they usually have 2X3 pin headers which are used for a form of In-System programming known as in-circuit serial programming (ICSP). The header pins comprise of 3 SPI pins (MOSI(D11), MISO(D12), SCK(D13)), VCC, GND and a reset pin and these are the pins used to program the microcontroller on the Arduino. By connecting a Atmeg328p microcontroller to these pins, we will be able to flash the Atmeg328p microcontroller with the Arduino bootloader.
Required Components
The following components are required to follow this tutorial;
- Arduino Uno/Duemilanove
- Jumper Wires
- BreadBoard
- Atmega328p microcontroller
- 16 MHz crystal oscillator
- 22pf capacitors
Bootloader Upload Procedure
1. Prepare the Arduino as an ISP Programmer
Under the examples shipped with the Arduino IDE is the “Arduino as ISP” example which when uploaded to an Arduino board transforms the board into an ISP programmer. Open the example and Upload to your Arduino Uno or Duemilanove.
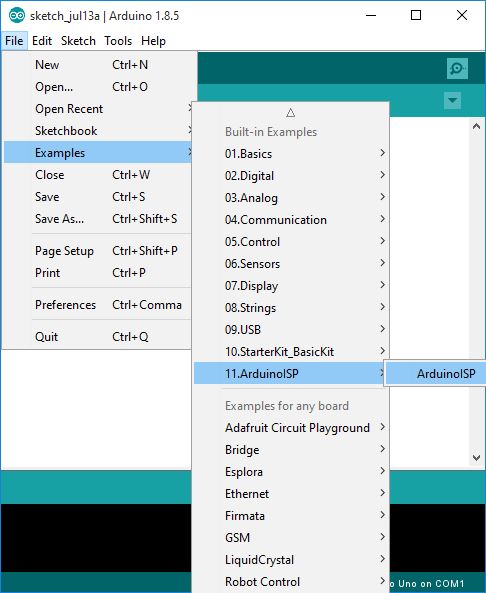
2. Wiring
Next, connect the Atmega328p to be flashed to the Arduino via a breadboard as shown in the Schematics below.
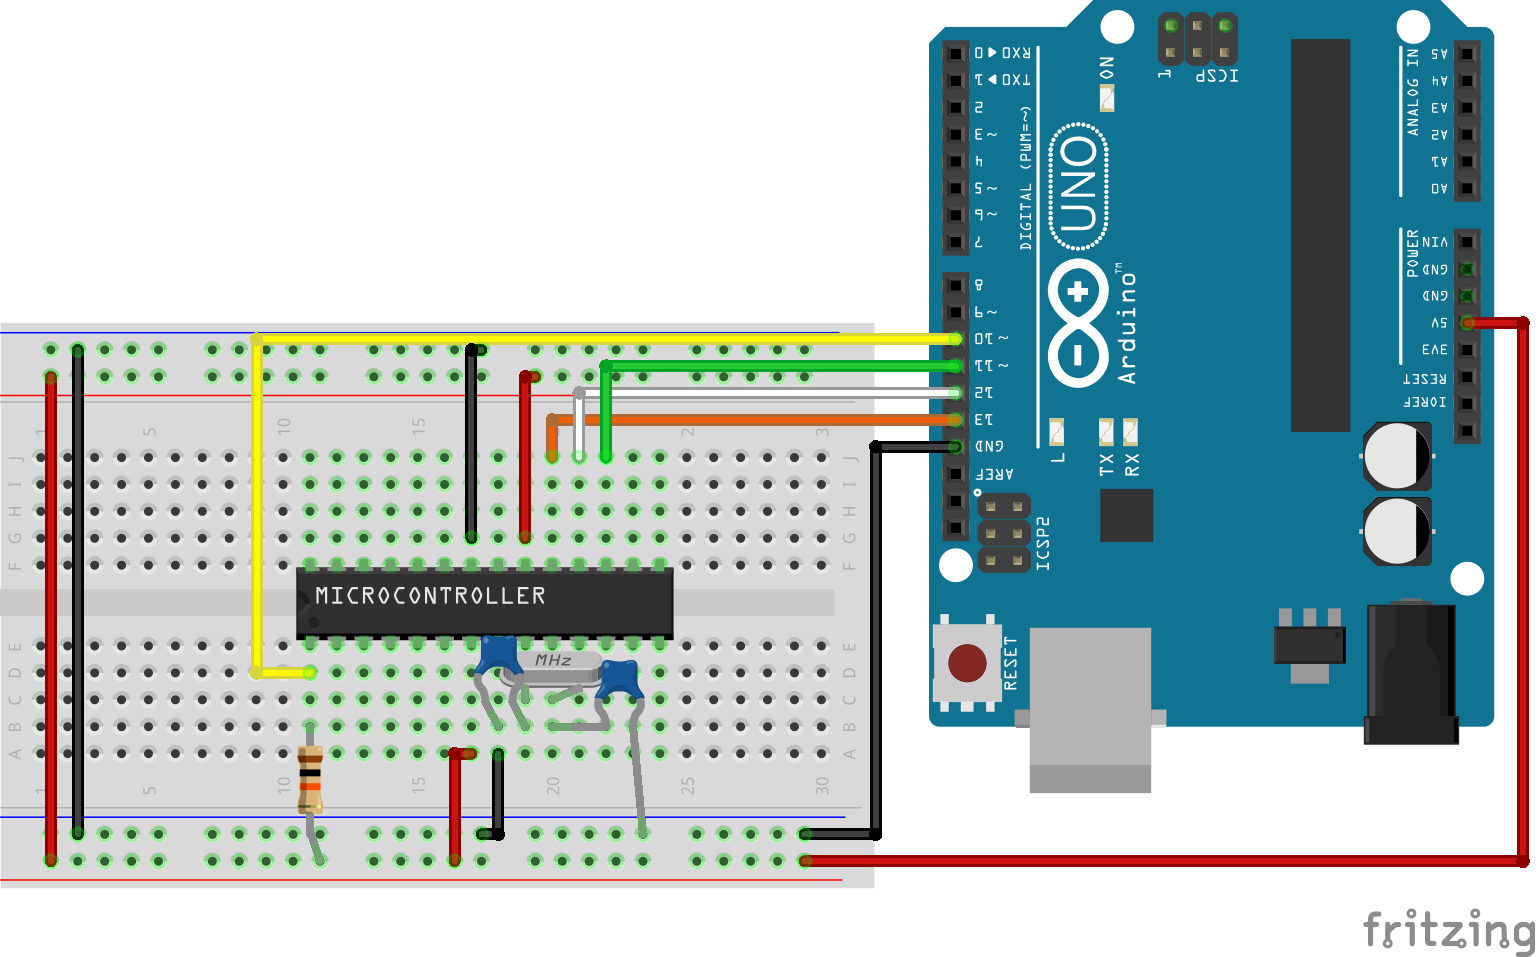
Below is a pin map of the connections so it is easier to follow.
Arduino – Atmega328P
D13 - Pin 19
D12 - Pin 18
D11 - Pin 17
D10 - Pin 1 Reset (no Capacitor needed).
VCC - 5V
GND - GND
Some setups include extra parts like LEDs which are used to monitor the bootloading status, but these are not necessary, as long as your connections are correct, burning the bootloader takes only a couple of minutes.
3. Burn the Bootloader
With the connections done, we are now ready to burn the bootloader.
Prepare the Arduino IDE by going to tools, Boards, then select the Arduino Uno as the board type. With that done, go to tools>programmer and select “Arduino as ISP” as the programmer. The final action to burn the bootloader is to go to tools and select Burn Bootloader. It will take the board you selected and search the board.txt file for the bootloader associated to it in the bootloader folder. It is important that your Arduino IDE is properly installed with all the board files as this will not work if the selected board type is not available, but its a very rare scenario.
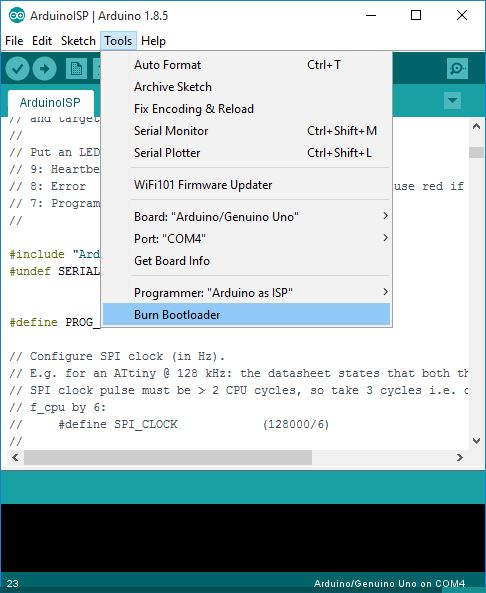
With this done, You should now be able to upload any code directly from the Arduino IDE to the Atmega328P microcontroller and use it for standalone purposes.
With the bootloader now on the chip, you can start uploading custom Arduino sketches to it following the tutorial here.
That’s it for this tutorial, Thanks for reading. Feel free to drop any question you might have as regards this via the comment section.
Till next time


how to buy it
You can buy Atmega328p is a variety of online eshops.
Thank you a lot for such a clear, comprehensive, step-by-step, easy to follow guide.
Maybe, having the option to get this guide as a.pdf-file would be nice, just to add to my “AVR”-related stuff.
Anyway, thank you.
I’m getting the error as follows
avrdude: Yikes! Invalid device signature.
Double check connections and try again, or use -F to override
this check.
what should I do for this
I’m using Arduino 1.0.6
I have the same problem 🙁 I try to fix it whole day, but no success…